How to Do Video Color Correction Like a Pro
Wanted to make a colorful video with your clips but found out that they aren’t exactly that colorful? To make your videos look juicer, you need to employ color correction. Can’t quite wrap your head around this notion? Worry not. In this article, we’ll tell you how to color correct videos so that they look good.
Before we actually begin, we’ll have a look at what video color correction is all about. Once you get the idea, we’ll move onto the guide. In it, we’ll tell you how to easily color correct your video with Clipify, a free and intuitive video editor. Besides, we’ll also tackle other methods for you to have an alternative. Let’s get going!
What Is Color Correction in Video Editing?
In a nutshell, color correction implies fixing the video’s exposure, color and black and white balance. These changes need to make your clip look naturalistic or if you have multiple videos - to make them look consistent. More often than not, color correction fixes mistakes that were made due to wrong camera settings.
Color correction for videos should not be confused with color grading, which in turn is giving your video a distinct look through tampering with its overall color scheme. You can never start color grading unless you’ve performed color correction.

This is what you are adjusting when color correcting your video:
- Exposure
- Contrast
- Saturation
- Dynamic range
- Brightness
How to Color Correct a Video in a Snap
Now that you know what video color correction is, it’s time to perform it. To fix your video, we’ll be using Clipify, an automatic video editor. This software is free and suitable for users of all skills. So even if it is your first time ever working with a video editor, you’ll easily get the gist of it. Let’s see how you can use Clipify to color correct your videos.
- Start Clipify. Run the program, then add your video file to the timeline.
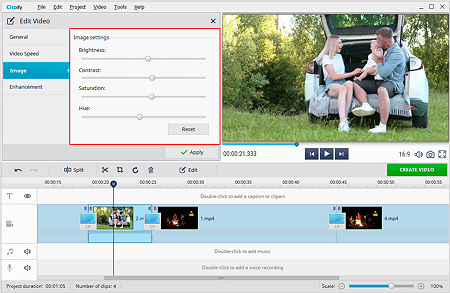
- Move to the Edit Video module. Highlight your clip, right click it and choose Edit. Switch to the Image tab.
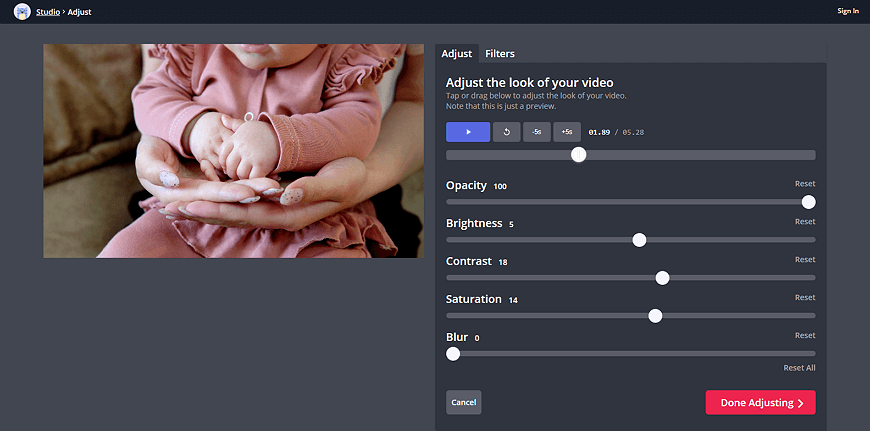
- Adjust your video settings. Drag sliders to adjust brightness, saturation, and contrast of your clip to make it look neat.
And there you go - your video is fixed and looks so much better. And it only took you a couple of minutes. Still feel like there is room for improvements? Good news - Clipify has a pro-level tool for those of you who strive for perfection. Curious? Then let’s find out how to do color correction for your videos using Curves.
Step 1. Pick the Curves Tool
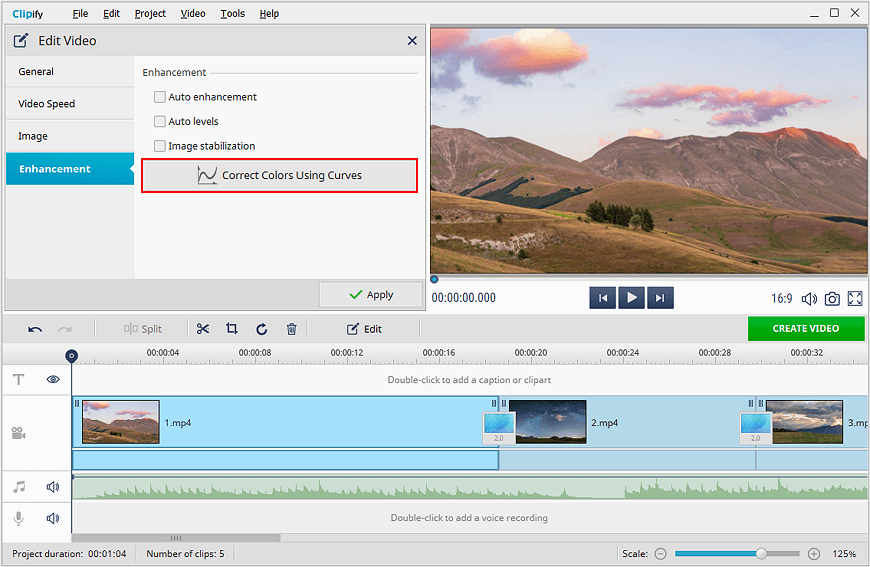
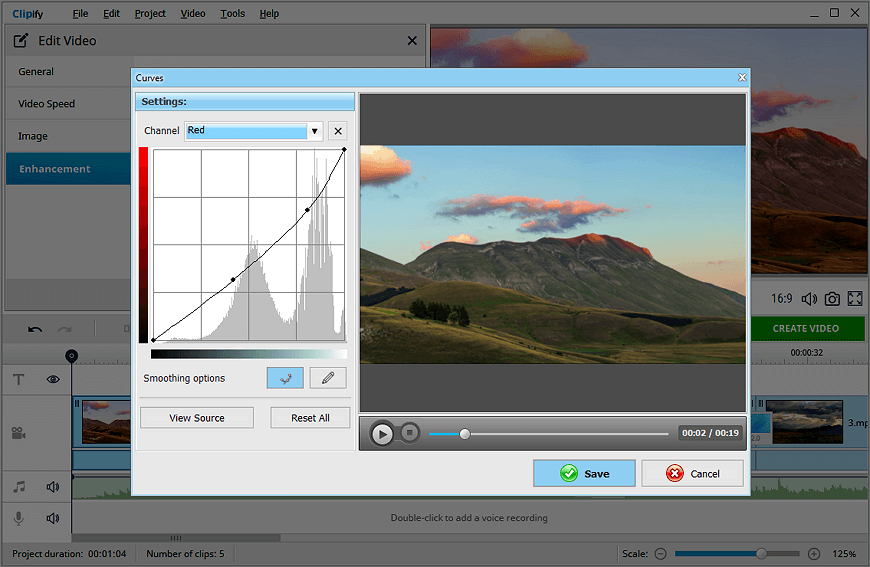
Highlight your clip, then click Edit. Switch to the Enhancement tab and click Correct Colors Using Curves.
Step 2. Fix the Brightness
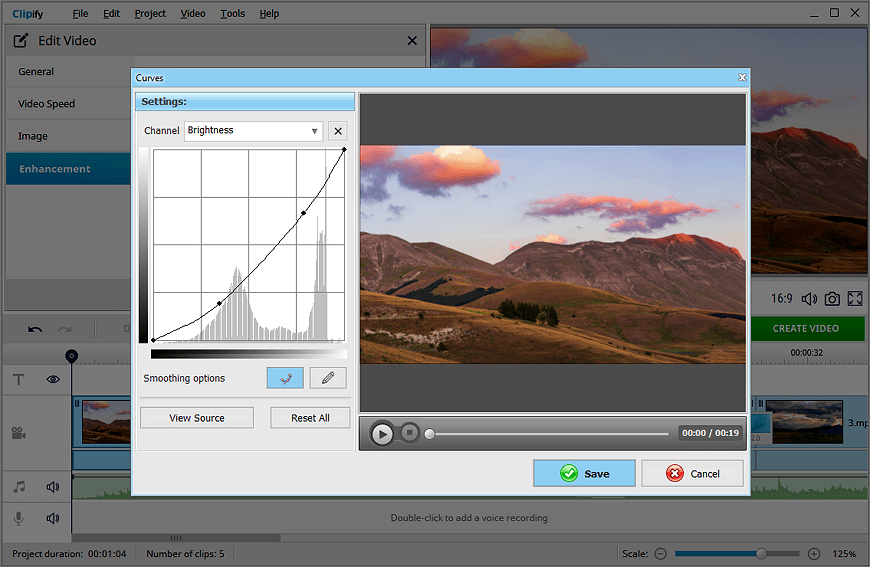
First, pick the brightness channel. Curve the line upwards or downwards, depending whether your footage is too bright or too dark. You’ll have a more precise modification if you add multiple points.
Step 3. Perform Video Color Correction
It’s time to work with the RGB channels. Pick the color channel you want to adjust from the dropdown menu. If your video has a distinct color cast, adjust the corresponding channel by curving the line up or down.
This method is a bit more complicated, but if you are looking for a more precise fine-tuning of your video, Curves are a way to go. They allow you to give your clips a polished look. Want to improve them even further? Clipify offers you all the tools for that. With this editor, you can make the quality of a video better, get rid of ugly black bars, remove audio from videos, stabilize a shaky clip, change the speed, add a photo on top of your video, and much more.
 Clip
Clip