How to Remove the Sound from Videos: Best 8 Ways
How many times have you recorded a beautiful video but the noise in the background stopped you from sharing the footage with relatives and friends? We’ve all been there. But don’t give up on your video just yet. You can easily get rid of the unwanted sound, and we’re here to help you.
In this article, we’ll share the best ways to mute a video in 2025. You will discover how to do that in a range of free and paid programs: advanced video editors, mobile applications, online services, and uncomplicated programs for audio removal. Whether you use a Mac or a PC, an Android or an iOS device, you’ll find a convenient video editor here. So, read on to discover how to remove audio from your video with a number of tools.
Way 1. How to Remove Audio from Videos in Clipify
Clipify is free video editing software offering an intuitive interface and an extensive toolkit of useful features for both newbies and pros. For instance, this powerful software lets you color correct and trim your footage, change the aspect ratio, and even stabilize your video. Clipify will be the right choice for those who want to easily remove audio from videos on Windows 10, 8, 7, and even the latest Windows 11. Like any other task, muting a clip will take mere seconds in this video editor. Just follow the simple steps below and enjoy the result.
Step 1. Install Clipify on Your Computer
For starters, download the installation file. Clipify is lightweight software, so the downloading process won’t take long.
Now install and launch the program. Once that’s done, move on to editing.
Step 2. Remove the Sound from Your Video
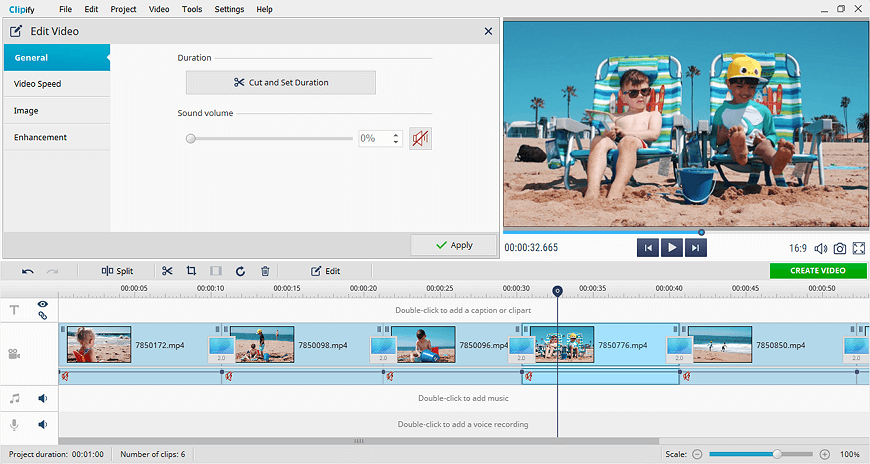
Start a new project and add all the clips you want to mute - just click Add Videos and Photos or drag and drop your footage to the timeline. Now delete the sound from your video - right-click your video clip and pick Mute. Alternatively, you can go to the Edit menu and stay on the General tab where you have to set the Sound Volume slider to 0 or simply click the Mute icon. Once your video is silent, you can accompany it with a soundtrack from your PC library.
Step 3. Save the Edited File
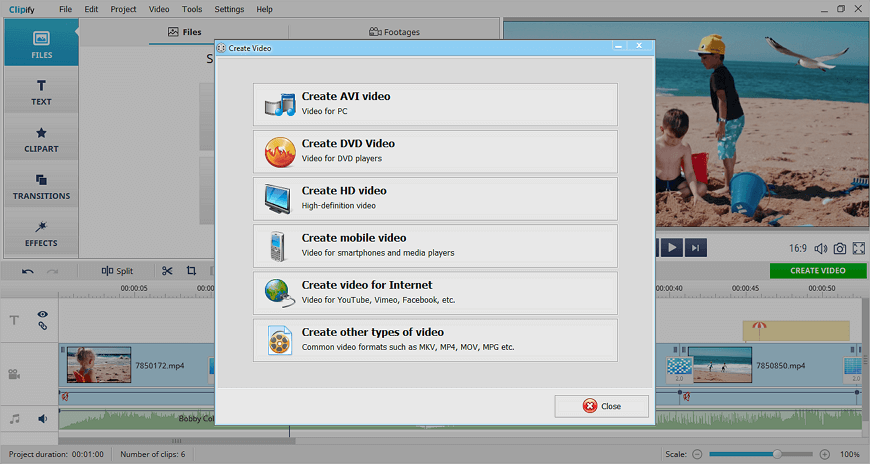
At this point, you can apply a filter, zoom in on your video, experiment with cliparts and artsy transitions, or make any other additional changes to your video. Finally, export your upgraded footage to your computer - click Create Video, select the needed format and save the file.
If you regularly shoot clips for the Internet, then be sure to check out how to voice over a video in Clipify. It might come in handy for editing reaction videos, YouTube vlogs, and video tutorials. Such a skill will let you significantly improve your content.
The user-friendly video editor also allows you to get rid of black bars on a video so that your footage fits any screen you choose. In case there are parts of your video that don’t appeal to you, don’t rush to cut them all out. Instead, use Clipify to speed up certain parts of a video and make it more engaging and dynamic.
 Clip
Clip