How to Edit an MP4 Video - 7 Ways to Make It Better
MP4 (MPEG-4) is a popular video format compatible with almost any device. You can use it to store video files, images, subtitles, and simple animation. What makes MP4 so popular is that it preserves high quality while being pretty small in size. That makes this format perfect for both saving on your computer and sharing online. But before you get to that, you might want to edit your MP4 videos a little. This leads to a question: what’s the best way to do so?
In this guide, we will explore how to edit an MP4 file step-by-step: enhance, trim, and stabilize it; change its speed and resolution; improve the video’s audio; embellish it. You will see all of that done in a free automatic video editor called Clipify. We will also show you alternative ways to edit your files on Mac, your smartphone, and online.

After you have learned how to edit an MP4 file, you will be fully ready to move on to editing, even if it’s your first time in video post-production. So don’t hesitate and get started with the quick Clipify tutorial below!
Way 1. Edit MP4 Video Files Automatically
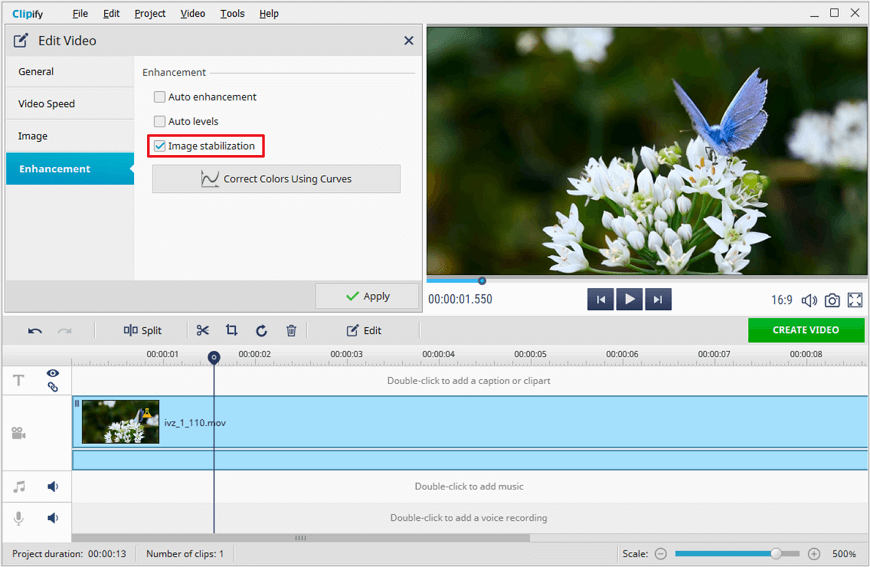
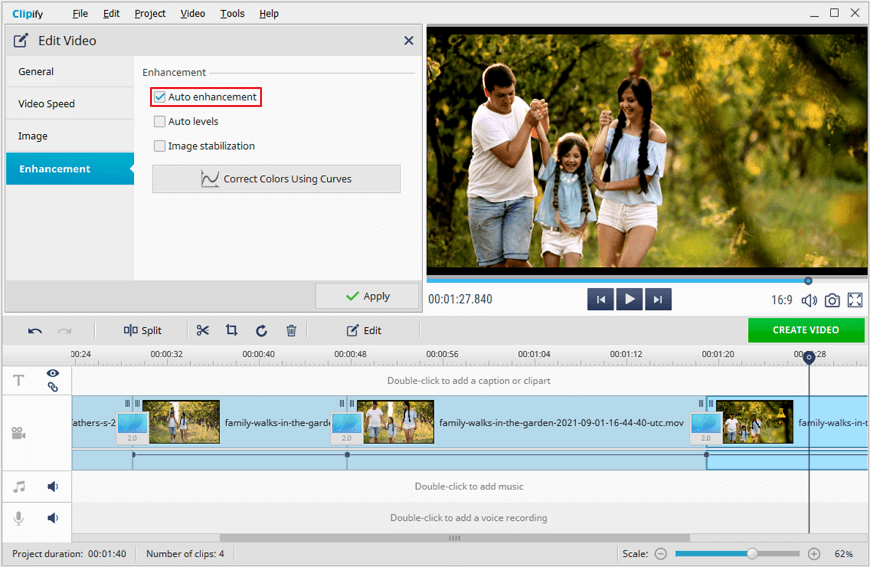
Clipify has a cool feature called Auto Enhancement. In just a single click, it improves your video’s lighting and contrast, enriches its tones, and makes the overall video look a lot better, even if you recorded it with your smartphone camera. Let’s move on to see how this feature works.
- Run Clipify. Get the free video editor installed on your PC and start it.
- Open your video within the program. Stay on the Files tab and hit Add Video and Photos to open your MP4 in the software. Alternatively, you can drag a video file from a folder on your PC and drop it to the timeline.
- Apply the Auto Enhancement feature. Click Edit on the toolbar above the timeline. Go to the Enhancement tab and click the Auto Enhancement checkbox.
Way 2. Cut and Stitch Your MP4 Video
If you want to edit your MP4 file’s length, remove some scenes from it, or add pieces of other footage, you can easily do that in Clipify. Splitting your video into parts will also allow you to apply effects and transitions to specific moments. Apart from this, the free video editor will help you remove black bars from your video or crop it to catch a better frame. Let’s have a look at the tutorial to get a closer look at the process.
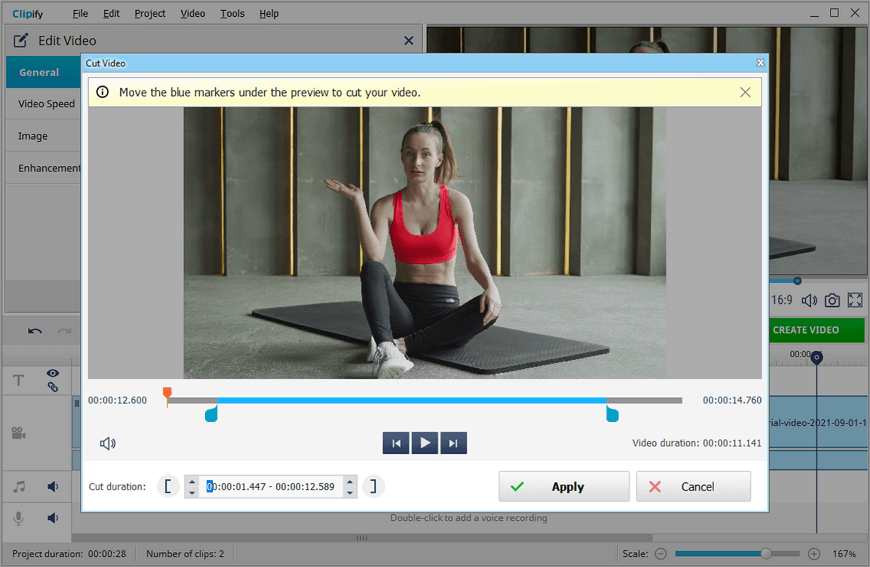
- Trim your video. Select the clip you want to cut and click Edit on the toolbar. On the General tab, choose the Cut and Set Duration feature. Use the blue markers to mark the part of your video you want to keep and hit the Apply button to remove the footage outside your selection.
- Split parts of your clip. Return to the timeline. To split your video into separate fragments, drag the playhead to the needed moment of your clip and use the Split tool to separate your footage into pieces. To delete a particular scene, select it on the timeline and click the trash bin icon on the toolbar.
- Crop your video. Choose the video piece you want to crop and click the Crop tool on the toolbar. Pick the Fill Frame option to remove black bars or crop your video manually to a custom size.
Way 3. Edit the Sound of Your MP4
Clipify’s handy sound editor will help you fix the sound of your video: adjust its volume, add audio points, or mute it. Make your video silent if you have changed its speed or added extra footage. Then, you can complete your clip with one of the program’s 500+ free soundtracks. Find out how to do that below.
- Adjust the original sound of your video. Click the video in which you want to edit the sound. Choose Edit on the toolbar and stay on the General tab to adjust the Sound Volume slider.
- Mute your MP4 video. If you want to make your video silent, select the Mute option from the same menu.
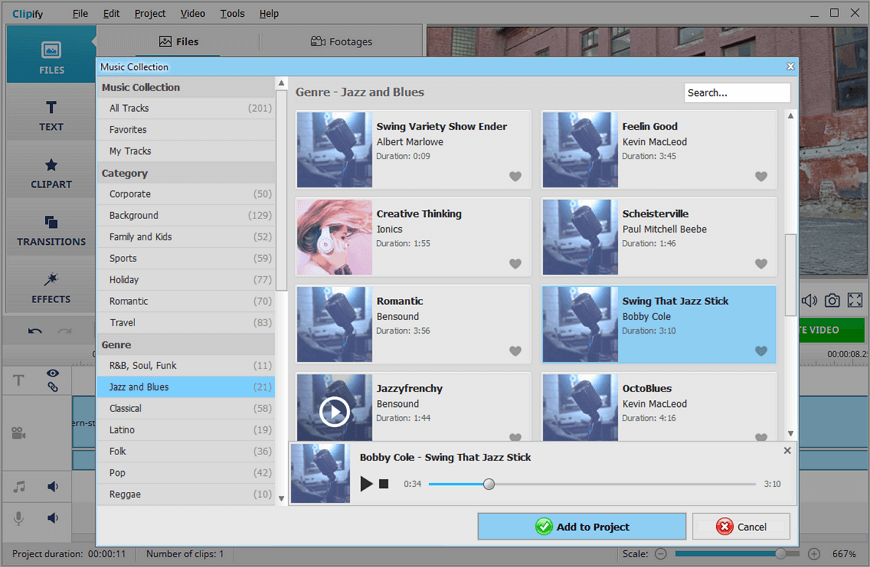
- Accompany your video clip with music. Switch to the Files tab and choose Open Music Collection. Here, pick the song according to the mood of your clip and hit Add to Project. Otherwise, go to Add Audio Files and import songs from your PC’s library.
- Edit your MP4 video soundtrack. Right-click your song to adjust its settings: cut it, add fade-in and fade-out effects, change volume, etc.
 Clip
Clip