How to Make Video Quality Better Without Pro Tools
How many times has this happened to you - you shoot an awesome scene only to find out that the quality of your video is less than perfect. Well, there goes the awesome movie you wanted to put together, right? Don’t get discouraged. There are a few surefire ways to save your clips.
Today, we’ll tell you how to make a video better quality. We’ll share with you 10 doable tricks that will help you improve your footage. For that we’ll be using Clipify, an automatic video editor. This easy-to-use software is chock full of tools and we’ll have a look at how to use them to fix such common video problems as low brightness, shaky cam effects, or ugly black bars. Seeking an online solution or mobile application? Read till the end and pick a suitable alternative for you.

No more time to waste! So let’s learn how to improve video quality so that you could finally put together your magnum opus.
Way 1. Enhance Your Video Automatically
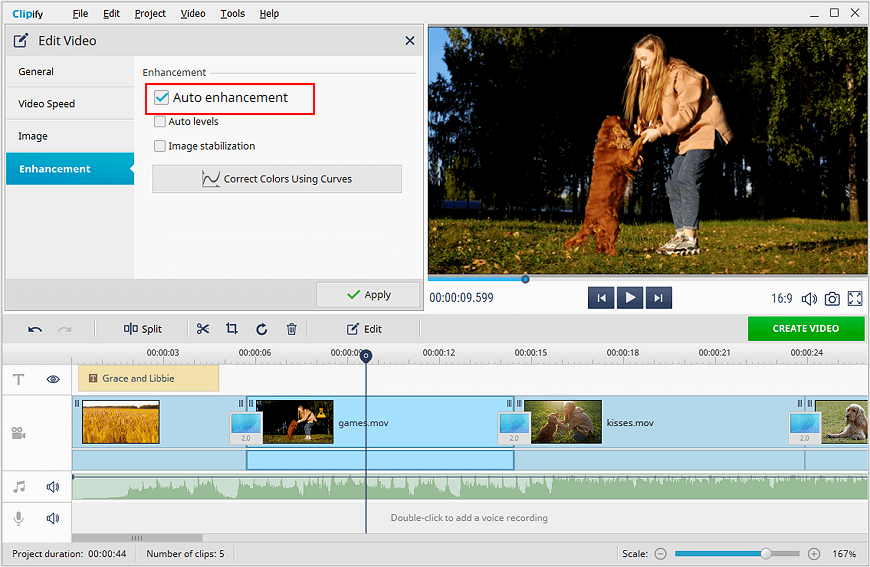
Clipify has the perfect tool to improve clips - an auto enhancement button. By clicking it, you will fix your footage in terms of colors and tones. Even a newbie can handle that. Let’s have a closer look at this time-saving feature.
- Run Clipify. Download this free video editor and start it.
- Open your video. Import your clip to the software. It will be automatically added to the timeline.
- Click the Edit button. Find the Edit button on the toolbar that’s above the timeline. Click it, then switch to the Enhancement tab.
- Improve your video quality. Now simply tick the Auto Enhancement option and see your video improve in terms of color and lighting.
Way 2. Increase Brightness of Your Video
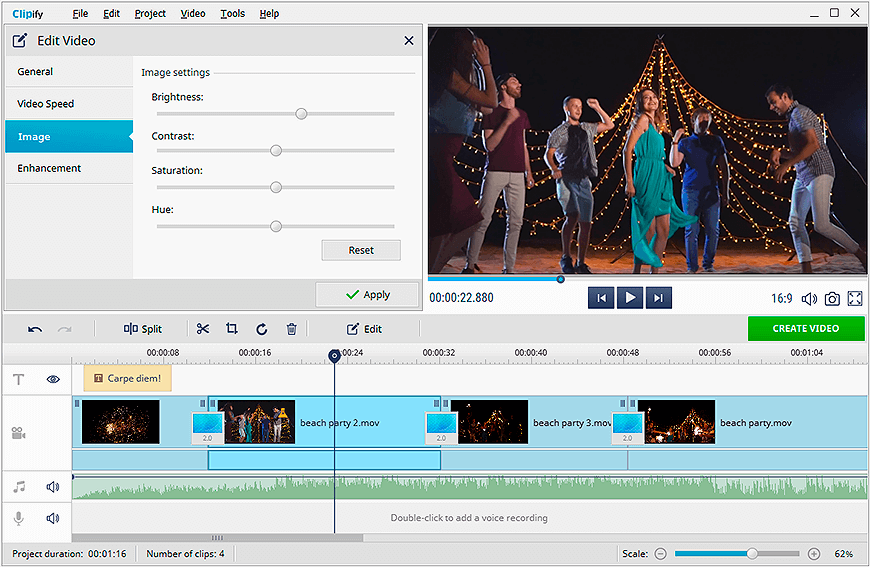
Sometimes instead of people in the frame, your video only shows obscure silhouettes moving in shadows. That means that your clip is way too dark. It’s fixable by increasing its brightness. This is how we do it.
- Import your dark video. Open your footage with Clipify by adding it to the timeline.
- Pick the Edit tool. Next, switch to the Image tab.
- Increase brightness. Drag the Brightness slider to the right to finally make out what’s in your clip.
Would you like to place a video clip on top of another? Then read this step-by-step guide about how to overlay a video on a video.
Way 3. Improve Colors of Your Video
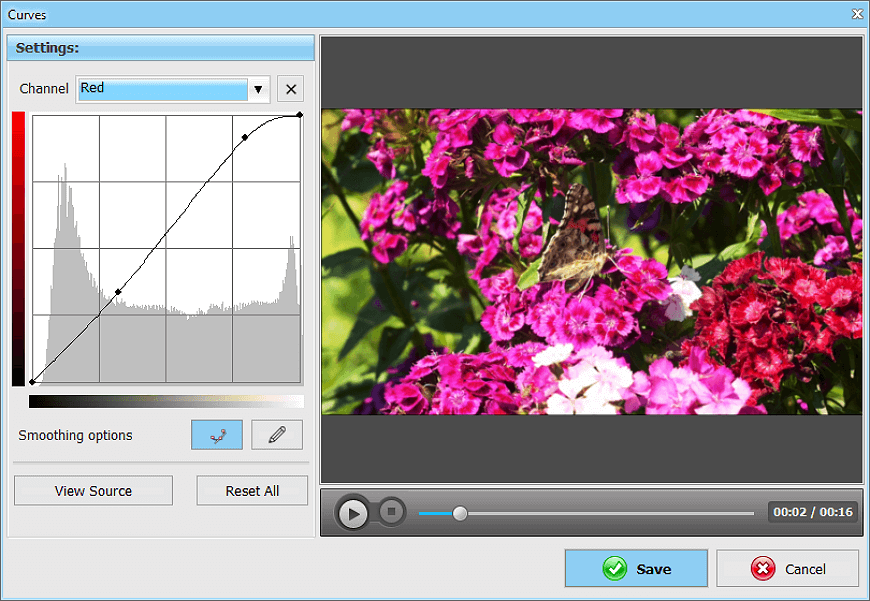
Sometimes auto correction isn’t enough to enhance your video quality. Its hues still need some tweaking. Want to do it like a pro? Then color correct your footage with Curves. You’ll be able to set your own color accents or add a surreal feel to your clips by overriding certain shades.
- Activate the Curves tool. Once on the Enhancement tab, click the button that says Correct Colors Using Curves.
- Fix the Brightness channel. Play with the Brightness settings to find the perfect balance of dark and light shades.
- Adjust other colors. Work with separate color channels to correct color cast flaws or achieve a high-contrast arthouse look.
Way 4. Clean Up Black Bars
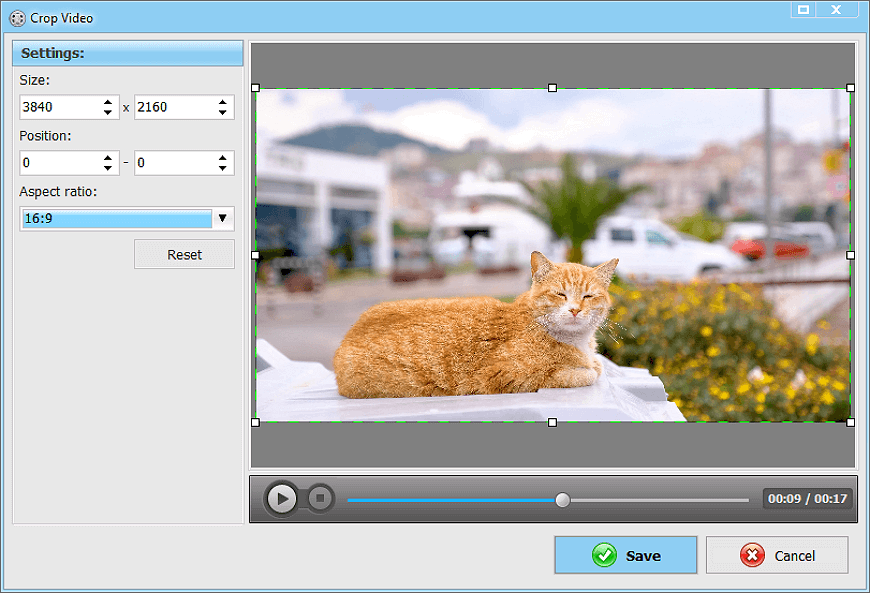
If you work with a video file on a screen that has a different aspect ratio, your footage will end up having black bars. This is a common flaw and it has a very easy solution. Let’s see how you can use Clipify to crop off the distracting black bars thus enhancing your video quality.
- Open your footage. Once you add your clip with a different aspect ratio, it will instantly be framed with black bars that fill empty space.
- Pick the Crop tool. Find the Crop icon on the toolbar and pick the Crop instrument.
- Cut off the borders. Now choose the new aspect ratio from the dropdown menu. Finally, click Save.
Way 5. Stabilize Your Video
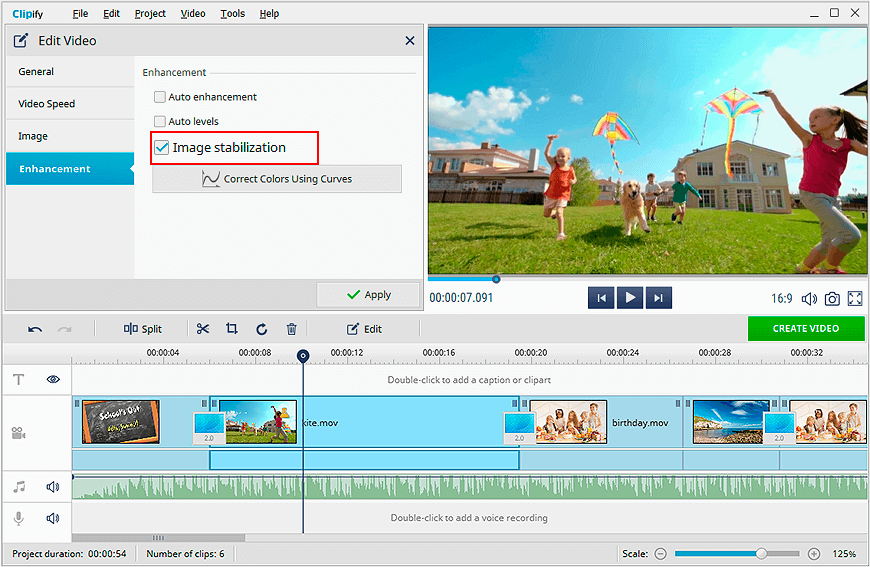
What if you were laughing your head off while holding your phone or your camera? Well, you’ll definitely end up with shaky footage that would be no good to use. Does that mean that you’ll have to recreate the scene to shoot it anew? No way. Just use Clipify to stabilize your clip.
- Choose the Edit tool. Once your footage is on the timeline, click the Edit button.
- Pick Enhance Image. Once again, switch to the Enhancement tab.
- Stabilize your clip. Just tick the Image Stabilization box and you’re done - no more shaky cam footage.
Way 6. Fix Resolution of Your Clip
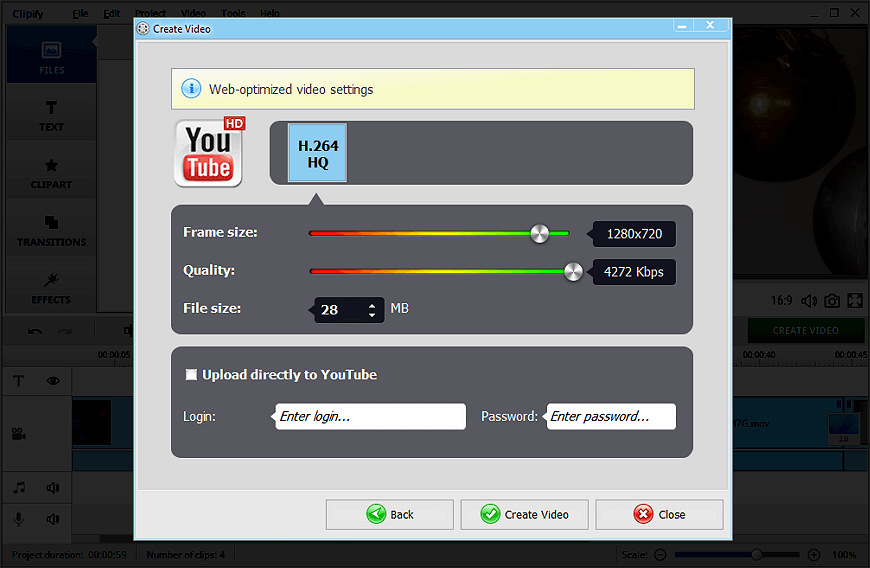
If you plan to show your movie on a big screen, it means that your creation should have a high resolution. Otherwise you’ll be showing just a bunch of pixels jumping around. Luckily, you can increase the resolution of your video with Clipify.
- Create your movie. Add your footage and edit it. Make sure to add effects and titles.
- Pick the export format. Browse through export options. Go with a video for PC, TV, mobile devices, or Internet - depending on your needs.
- Set the new resolution. Find the slider that reads Frame size. This is the resolution of your video. Now drag it till it reaches higher values. And voila!
Way 7. Make Your Video Sound Better
Sometimes the visual part of your clip can be perfect, but the sound can be of bad quality. Instead of tediously improving it, why not delete it altogether and accompany your clip with a tune and sound effects? Let’s see how you can add a soundtrack to your movie.
- Edit your movie first. Cut and stitch footage together to make a short movie.
- Pick a music track. Either choose a music piece of your own by clicking Add Audio Files, or add a track from the software’s 500+ library.
- Edit the audio track. Use audio points to fine-tune your audio track - make the sound louder or turn it down to match certain moments in your video.

Creating videos with a webcam couldn't be easier! Find the best methods to make them in this guide about how to record webcam videos.
Way 8. Apply Effects and Filters
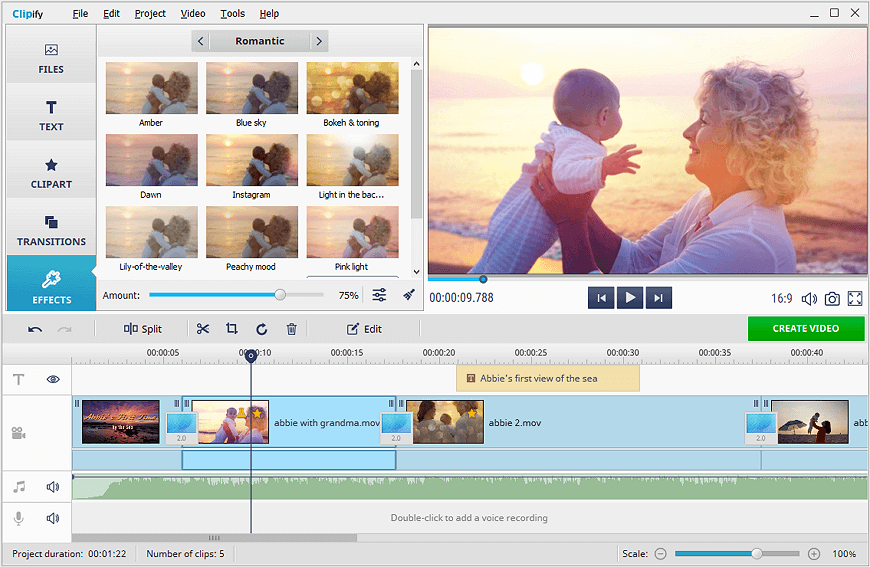
One of the best ways to make a video of a higher quality is to stylize it with a special effect. A wisely chosen filter will conceal whatever flaw your video has and will help bring out the best in it. Clipify is equipped with 150+ effects that are divided into categories for your convenience. Let’s see how you can apply them.
- Add your footage to the timeline. Open your clip by clicking the Add Videos and Photos button.
- Switch to the Effects tab. Find the Effects tab on the left side of the screen. Once you move to it, you’ll get access to dozens of built-in filters.
- Apply the effect you like. Browse through the effect categories and pick the filter that would complement your clip the most.
Way 9. Create Close-Ups
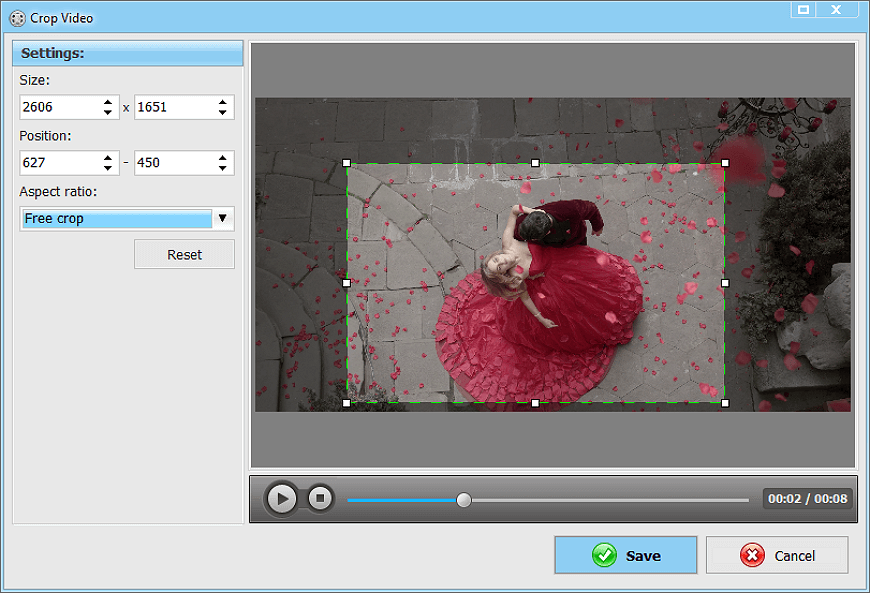
Here’s a less obvious tip on how to enhance a video. More often than not random objects and people find their way into our footage. Get rid of distraction and focus on what’s important. Just zoom in on your video to cut out the rest. Clipify has the right tool for the job.
- Pick the Crop tool. Once you’ve opened your video in Clipify, click the Crop button. Then, choose the Crop tool.
- Set the new frame. Make sure that the Free Crop option is activated. Now, just choose the area you want to zoom in on.
- Save the zoom. Click Save and enjoy your new close-up footage. A good idea is to alternate between close-ups and wide shots.
Way 10. Crop Out the Unnecessary
While we are on the subject of getting rid of distractions, make sure that the footage you are using has none of them. No stalling, no previous ruined takes, no mumbling and shaking of the camera while trying to figure out how to work it. Let’s condense it into one sentence - get rid of the blooper reel! Here’s how you do it.
- Pick the Cut Videos feature. As you start Clipify, the first screen will offer you a few shortcuts to the most popular features. Go with Cut Videos.
- Upload your file. Choose the video file you want to trim or edit and open it.
- Cut your clip. Drag the start and end markers to determine which footage you want to cut and which to keep. The blue marker will indicate the footage that gets to stay.

 Clip
Clip