How to Zoom in a Video like a Pro in a Few Steps
Ever wanted to direct your viewers’ attention to a particular place or object in your video and eliminate details around the edge? Or to create a dramatic shift between scenes, so your audience couldn’t get their eyes off it? You can easily achieve this wow effect! In this article, we’ll tell you how to zoom in on a video and create those jaw-dropping movies on your own. Sounds complicated? Good news: it’s not!
We’ll start with a step-by-step guide to using zoom in a video editor. We’ll show you how to bring the whole video as well as some particular scenes closer to your viewers using Clipify. It’s a free automatic video editor that's easy to use for people of all skills and experience. Then we’ll look at some other ways to create zoom effects. Let’s dive in!
How to Zoom in a Video Step-by-Step
As we mentioned above we’ll be using Clipify, automatic video editing software. Just choose your first video to apply this effect on and focus your viewers’ eyes on the details you want them to notice. Ready? Then follow our guide and see how this free video editor with zoom works.
- Run Clipify and open your video file. Click Add Videos and Photos, choose your clip, and add it to the timeline.
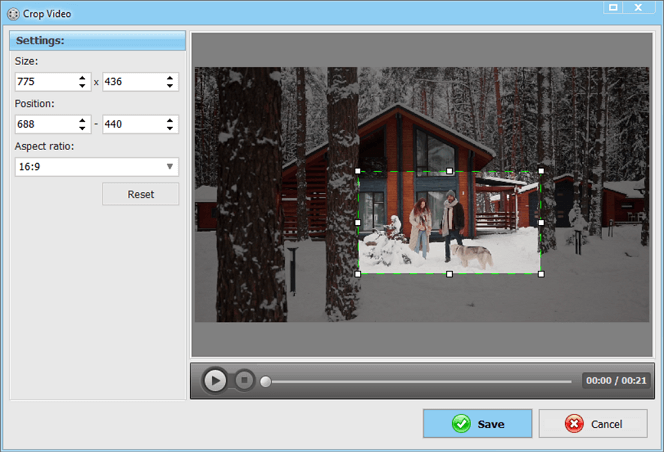
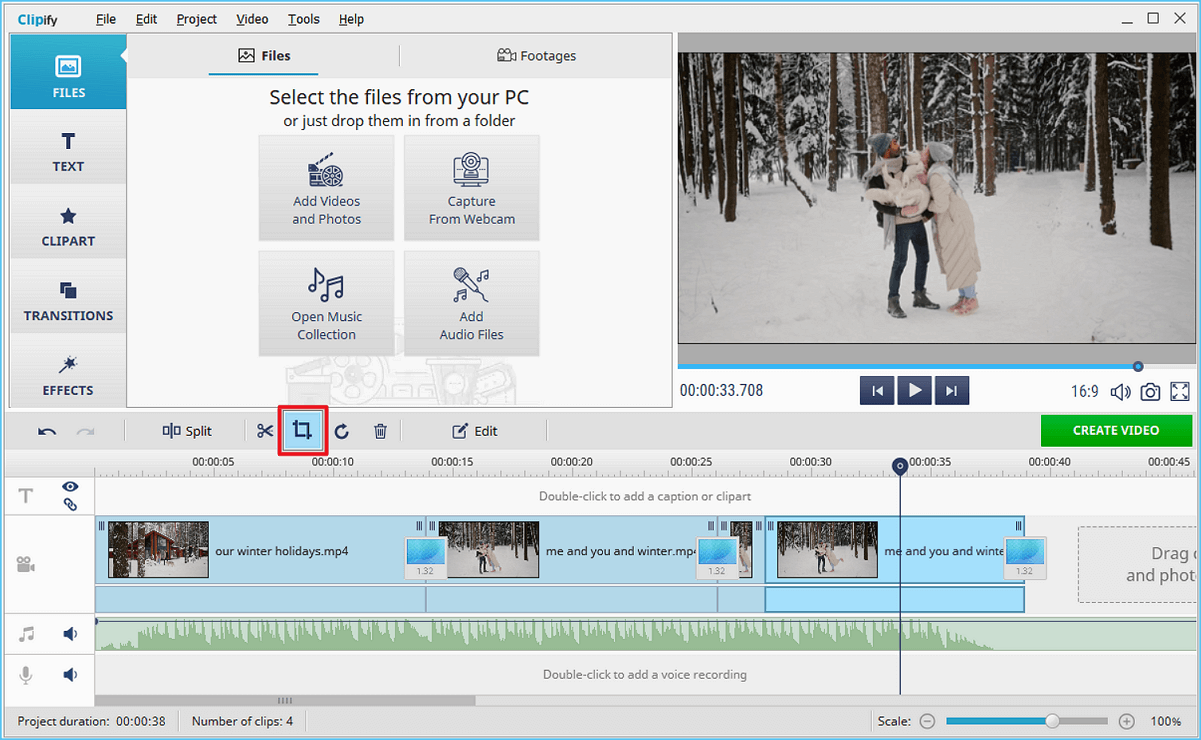
- Find the Crop button. Move the cursor onto the crop icon on the toolbar that’s just above the timeline.
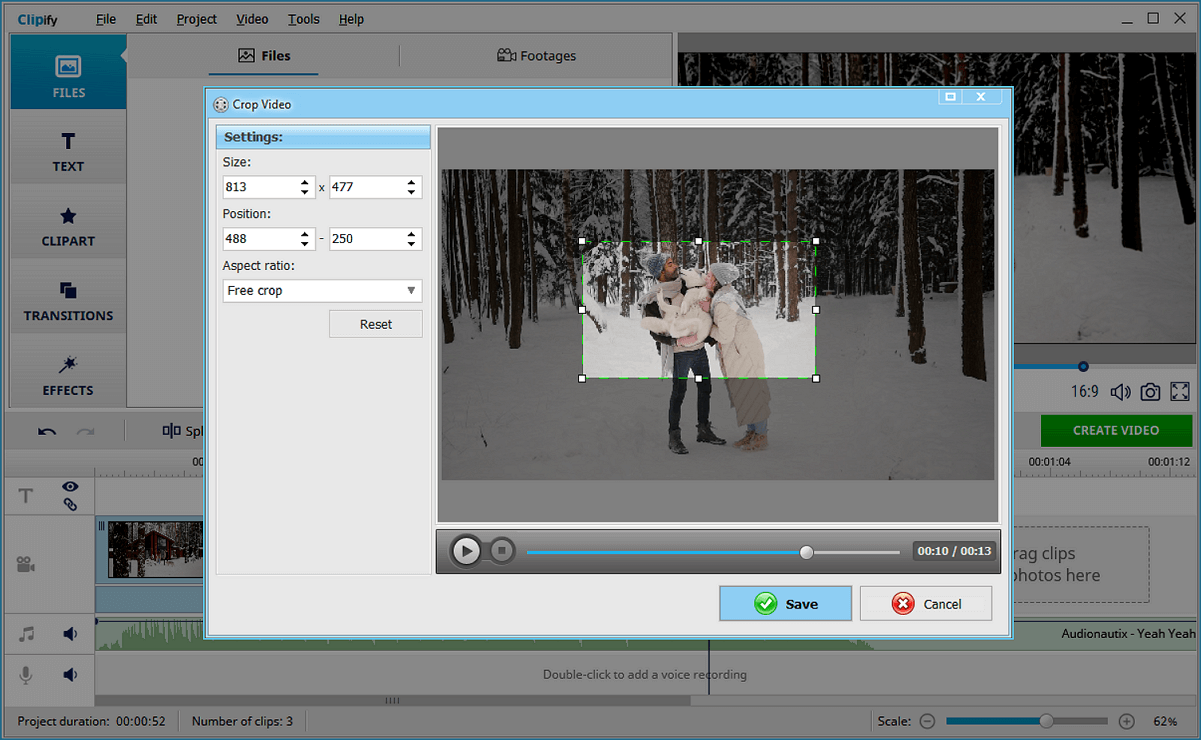
- Edit the size of the area to zoom in. Once finished, click Save. That's it!
Now you know how to edit the whole video. So if your clip was shot from a distance, you can scale it and bring the image closer to your viewers. But there’s one more way to make your video more dynamic and eye-catching. Apply a zoom in effect on some particular video pieces. Let’s have a look at how to zoom in on a video part with our guide.
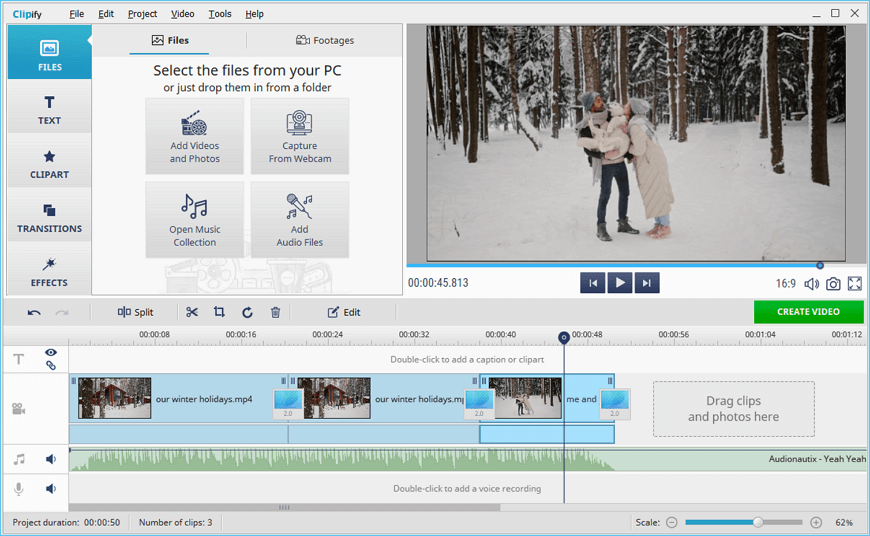
Step 1. Open the Footage You Want to Edit
As you’re running Clipify on your PC, click New project, choose Blank Project and open the video you want to edit. It’ll be added to the timeline.
Step 2. Split Your Video into Several Parts
Move the cursor to the start of the video section you want to zoom in. Click Split on the toolbar to separate this part from the rest of the footage. Now move the cursor to the end of the video section that you want to zoom in and separate it too.
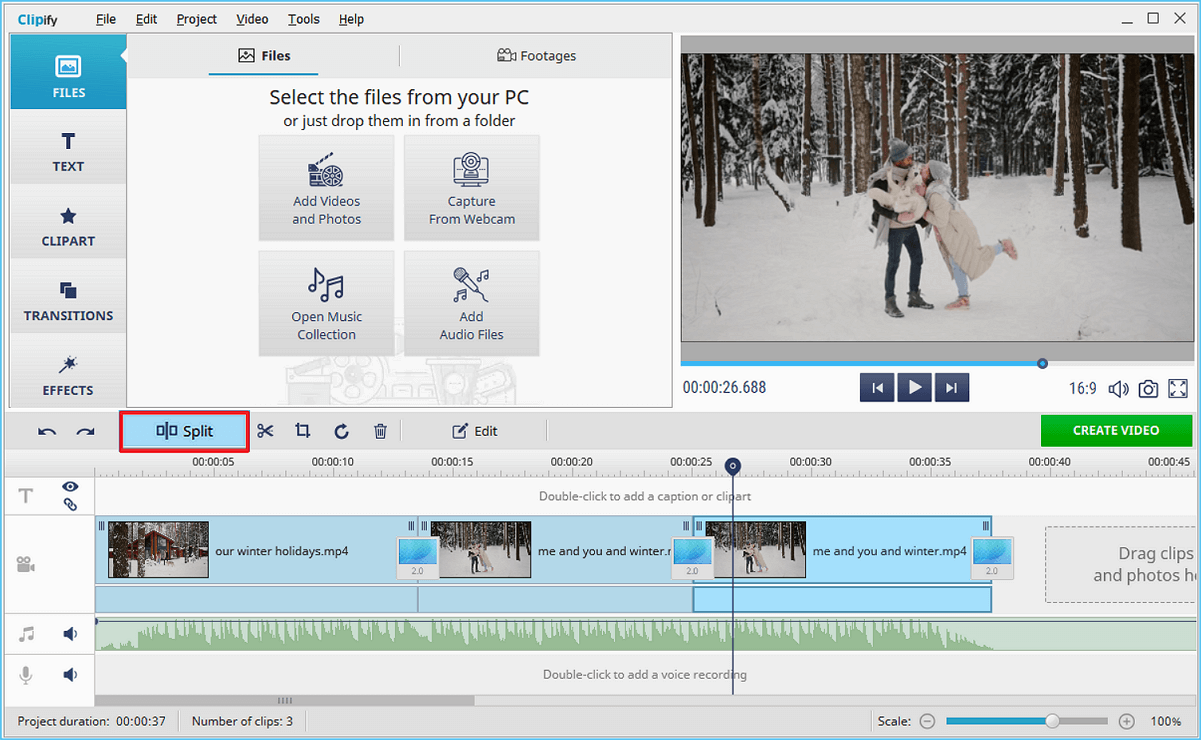
Step 3. Find the Video Zooming Tool
Move the cursor onto the crop icon. You can find it on the toolbar above the timeline. Click this icon and choose the Crop option.
Step 4. Set the Zoom Area
First, click Aspect ratio and choose one that fits your video best. It must correspond to your project proportions - this way, you’ll remove black bars from videos and get a smooth transition between the video parts. Now set the area to zoom in. To do that, edit the size of the rectangle area by dragging its corners to make it bigger or smaller. You can change the position of this rectangle, click it and drag it around the image. Once finished, click Save.
Step 5. Export Your Video
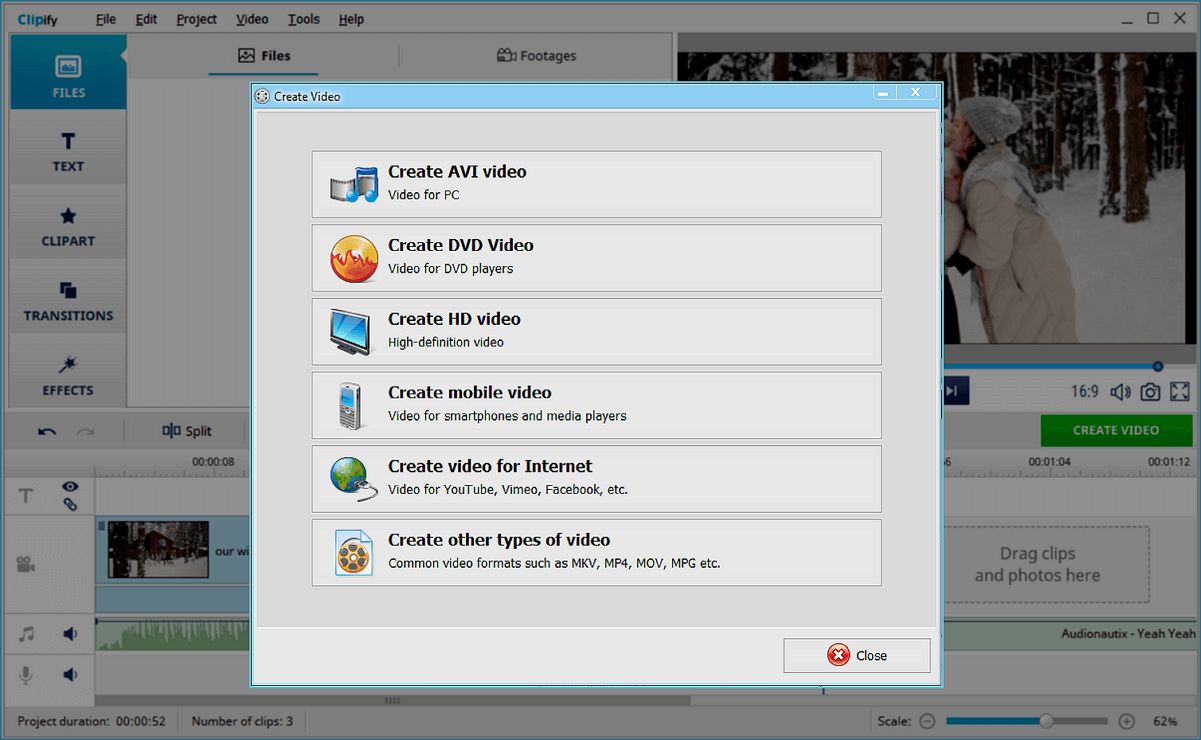
If everything looks fine, it’s high time to share your short movie! Click Create Video and choose the export option that suits you best. Save it for mobile devices to play it whenever and wherever you want. Upload it to the Internet to share it with your friends and followers. Or burn your video on a DVD to watch it any time sitting on your cozy sofa.
Feel your video is not complete? Stabilize the footage and make your clip really smooth. Add some text along with various stickers and literally tell a whole story in your video. Correct colours and make your short movie juicier. Speed up parts of a video to reach a wow effect. Lighten a video to improve its overall quality. Clipify is here to help you! It’s more than just a great video zooming software, it’s packed with a wide range of useful features as well.
 Clip
Clip