How to Remove Black Bars from a Video:
5 Best Ways in 2025
You have seen those - black bars that frame footage, either along the sides or on the top and bottom. While technically not a flaw, they are darn distracting and ruin the look of your video. Wouldn’t it be cool if you could get rid of them to help your viewer focus on the footage?
Today, we’ll share with you easy ways to remove black bars from your video. We’ll be looking at 5 different methods: Windows and Mac softwares and a web service. Besides, we are going to tackle the reason these bars appear so that you might be able to avoid them in the future.
Where Do Black Bars on Videos Come From
The simple answer is this - they stem from an aspect ratio discrepancy. Let’s look a little deeper. An aspect ratio is the proportional relationship of the video’s height and width. There are two most common types now: 4:3 and 16:9. Imagine this - you have a 4:3 video file, but play it on a screen with a 16:9 ratio. It just doesn't fit the frame and has chunks of empty space. This is where the borders appear to fill in the gap.

Your video can be plagued by both side bars and those that go along the top and bottom of a video. But there is no need to endure them, when you can easily get rid of these black bars in a jiff. Further on, we’ll give you 5 easy ways to do that. Take a glimpse:
1. Remove Black Bars from Video with Clipify
Always wanted to create movies, but got scared off by expensive and complex video editors? There is one software that is neither. Meet Clipify, a free automatic video editor perfect for creating stunning videos with your clips, images, and music. Clipify is equipped with two handy modes for removing black bars from a video. First, let’s have a look at the automatic mode.
- Run Clipify. Download this free video editor and open it.
- Open your video file. Click Add Videos and Photos, choose your clip, and add it to the timeline.
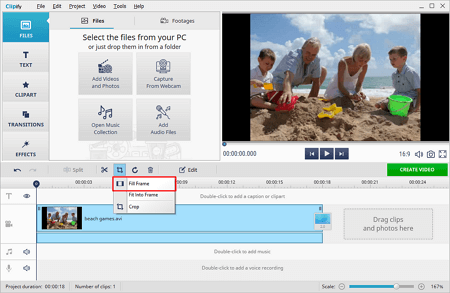
- Cut off black bars. Click the Crop button and select Fill Frame. The software will automatically remove the borders around your video. And you’re done!
This was the automatic way to get rid of those distracting bars. Now, let’s have a look at the manual method - this one is for those of you who like to have more control.
Step 1. Open the Footage You Want to Edit
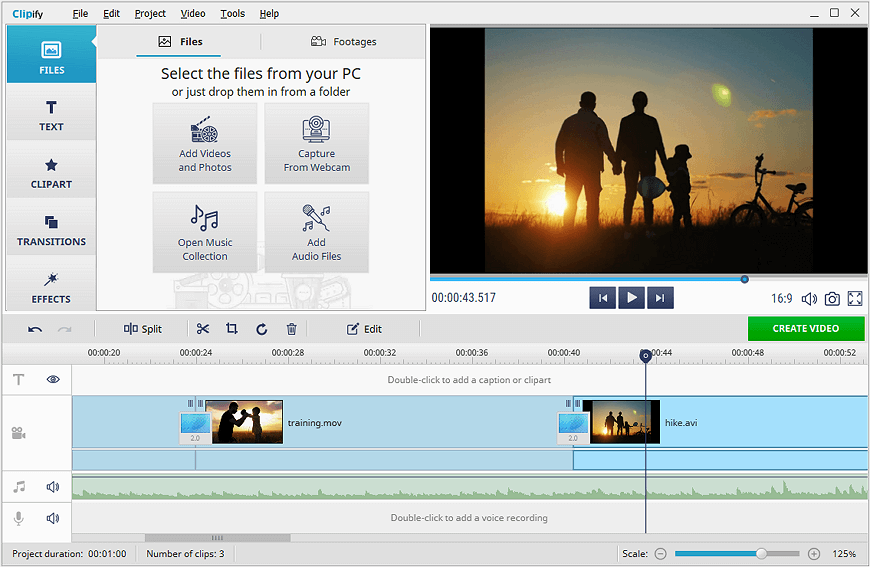
Start a new project in Clipify and open the clips you want to edit. They’ll be automatically added to the timeline.
Step 2. Set the Frame Borders
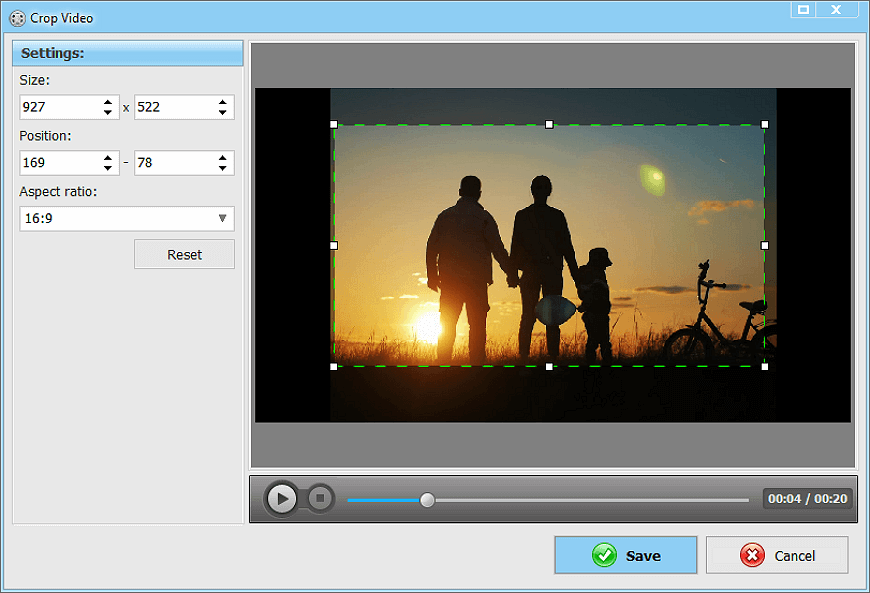
Click the Crop button and choose the Crop option. Set the aspect ratio you want your video to fit: 4:3 or 16:9. Alternatively, choose a Free Crop option to cut the frame the way you want.
Step 3. Remove Black Bars from Video
Now, simply click Save and watch your video assume the right proportions and shed off the ugly black borders.
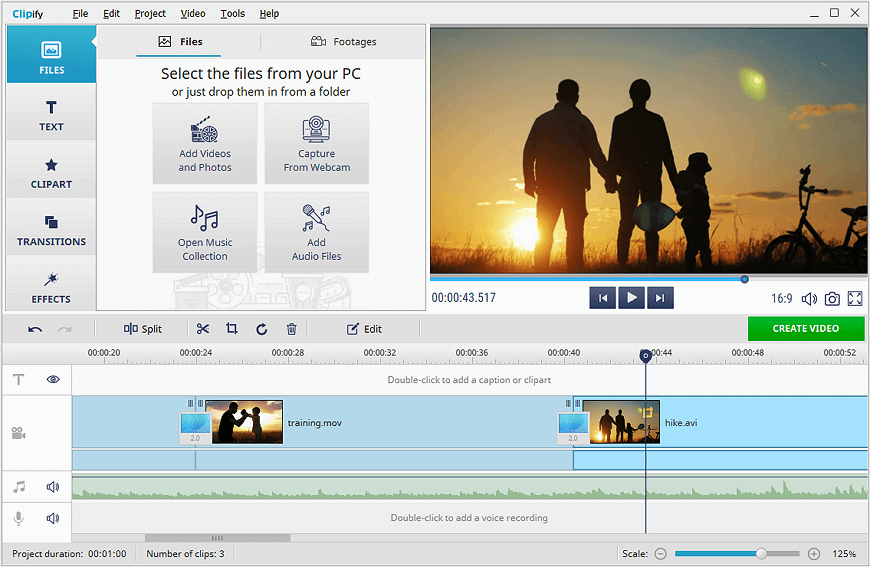
Clipify’s easy approach got you hooked? That’s all because this automatic video editor offers an extremely intuitive workflow. Apart from that, there are all the essential video and audio editing tools under the hood, as well as hundreds of stylish effects, spectacular transitions, and cinematic titles. You can have fun with the Chroma Key tool, cut sections out of a video, try dozens of video card templates, lighten dark videos, and even edit call recordings if you often need to record Google Meet calls. And all of that doesn’t cost a cent.
Want to try this easy video editor yourself? Then hit this button below to download Clipify for free and remove black bars from your video in a snap.
Once your footage is perfectly cropped, try Clipify’s many tools and effects to create an exciting movie to wow your audience.
2. Crop Black Bars from Video with Adobe Premiere Pro
Just like many other Adobe products, Premiere Pro is the staple of video editing software. Packed with video and audio editing tools and many effects and transitions, this pro-level instrument is not devoid of flaws. First of all, it has a truly confusing interface that newbies can easily get lost in. Besides, its price might be a deal breaker for some.
But nonetheless, let’s have a look at how to remove black bars from video on PC or Mac with Adobe Premiere Pro.
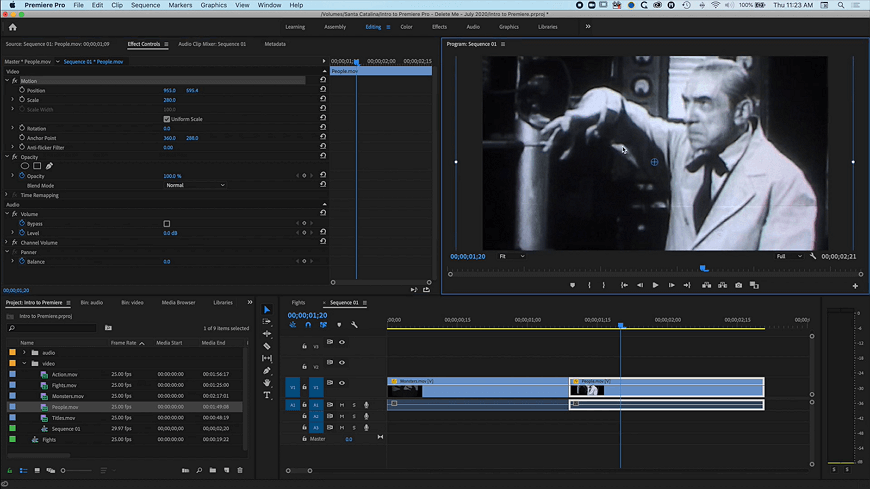
- Import the video you want to edit to Premiere Pro and drag it to the timeline.
- Switch to the Effect Control tab in the upper left corner and pick the Crop tool.
- Bring numeric values of the borders to negative so that the black bars disappear out of the frame. And it’s done!
Need to enhance an MP4 video but don't know how? Discover 7 ways to do it in this article about how to edit MP4 files.
3. Get Rid of Black Bars on Video with Windows Movie Maker
If you are a Windows user, chances are you have this software pre-installed. Just like many default programs, Windows Movie Maker has the essential editing tools, but lacks more advanced features or eye-catching effects. However, if you just need it for removing black bars from your video, this software will do the trick.
Let’s see how it works.
- Open your video with the program.
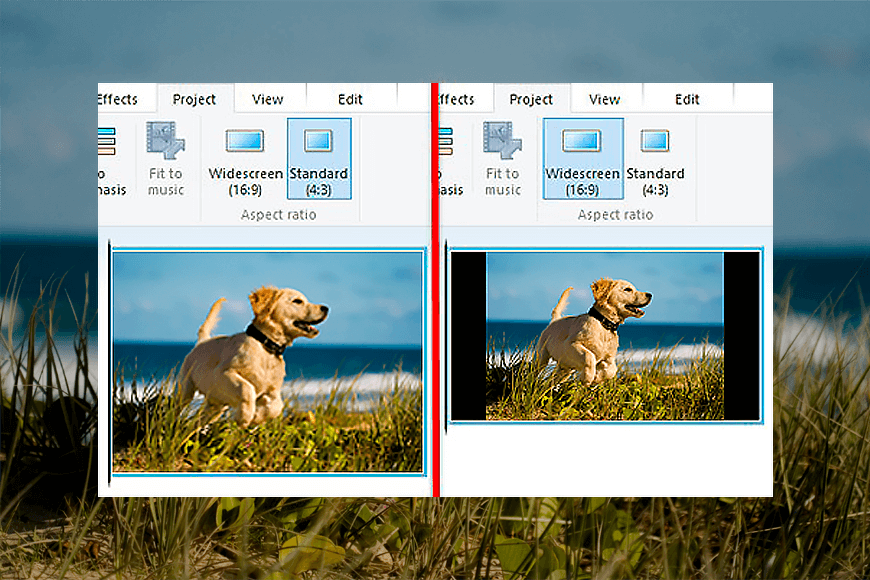
- Switch to the Project tab and find the Aspect Ratio option.
- Now, choose the aspect ratio - either Standard or Widescreen - to fit your footage into the frame.
Using your phone to shoot footage for your movie project? Avoid taking vertical videos - these clips will have enormous black bars on the sides when exported to video editing softwares. Consider shooting footage in the landscape mode. This way you’ll keep as much action within the frame as possible.
4. Remove Black Borders from Video Online
If you don’t want to clutter your hard drive with extra programs, consider online video editors. These web-based services have just about the same tools and features, but can be accessed through any device, not just your trusty laptop or computer. All you need is a stable internet connection. Today, we’ll have a look at an online video resizer called Clideo.
This is how you can fit your video into frame with it.
- Go to Clideo’s website and pick the Resize option.
- Upload your video file either from your computer or your cloud storage.
- In the Resize For menu pick Custom. Now set the proper aspect ratio so that the black bars disappear.

Want more out of your video editor than just to remove black bars? You'll find all your video editing needs taken care of in Clipify. With this program at hand, you can get rid of the shaky cam effect, boost colors of your video and apply 150+ special effects.
5. Remove Black Bars from Sides of Video with iMovie
If you are a proud Mac user, this method is for you. It features iMovie, popular video editing software for Mac. Just like Windows Movie Maker, this program is an entry-level video editor that has enough tools to make simplistic movies, but not enough to take them to a pro level.
Let’s take a gander at how iMovie can help you with your ill-fitting videos.
- Open your video with iMovie and add it to the timeline.
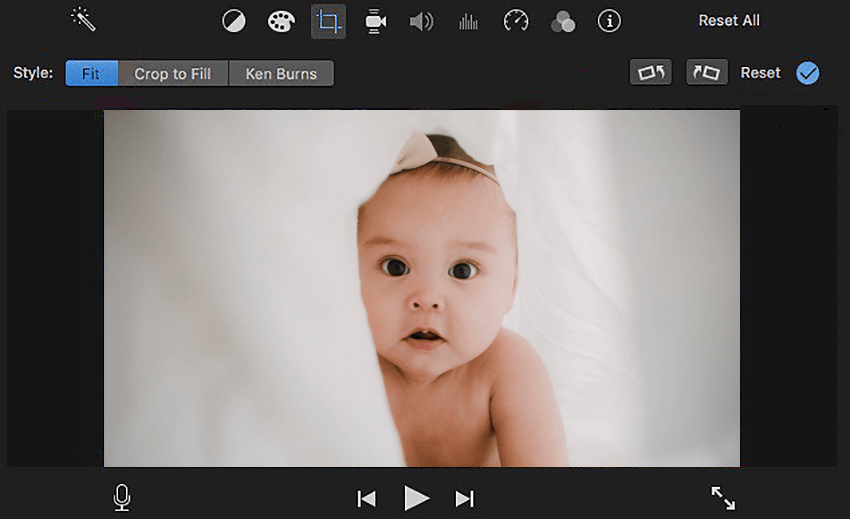
- Find the Crop button on the upper toolbar and hit it.
- Choose Crop to fill. The software will automatically fit your footage into the frame.
Say goodbye to ill-fitting clips and compromised aspect ratio now that you know how to remove black bars from videos. If you can’t decide on which way to use, here’s a little guide for you. If you are a Mac user, iMovie is definitely the way to go. If you have no desire to download new softwares, go with online editors like Clideo. In case you are a Windows user, Clipify is your optimal choice. This video editor is both easy and feature-packed, and most importantly free.
 Clip
Clip