How to Put a Picture Over a Video: An Easy Guide
Making videos is a good way to express yourself, keep your precious memories intact, create educational content or even business presentations. But what if you want to decorate the video or embed your personality into it? There are quite a lot of means to do that: apply some transitions, sprinkle in effects here and there, embed a text, or add a picture. The only issue is that it requires skill, time, and great effort.
In this complete guide, we will show you exactly how to overlay a picture on a video. It is great if you want to deliver your ideas through the images, create a postcard for a special occasion, make your tutorial more visually gripping, or add some humor. It will only take three steps. No wasted time or special skills needed.
Let us introduce to you Clipify, automatic video editing software that will spare you all the troubles. It’s free and easy to use. You will notice the interface is simple, so you can overlay images on a video in just one minute. Additionally, we will talk about other tools you can use for the same purpose.

Can’t wait to learn how to superimpose a picture on a video? Let's find out how to do it.
How to Put a Photo Over a Video in Three Simple Steps
Clipify is a useful free tool enabling you to create awesome quality videos. It makes editing easy and joyful and has plenty of tools you can play with. Just by following this guide, you will learn how to put a picture on top of a video.
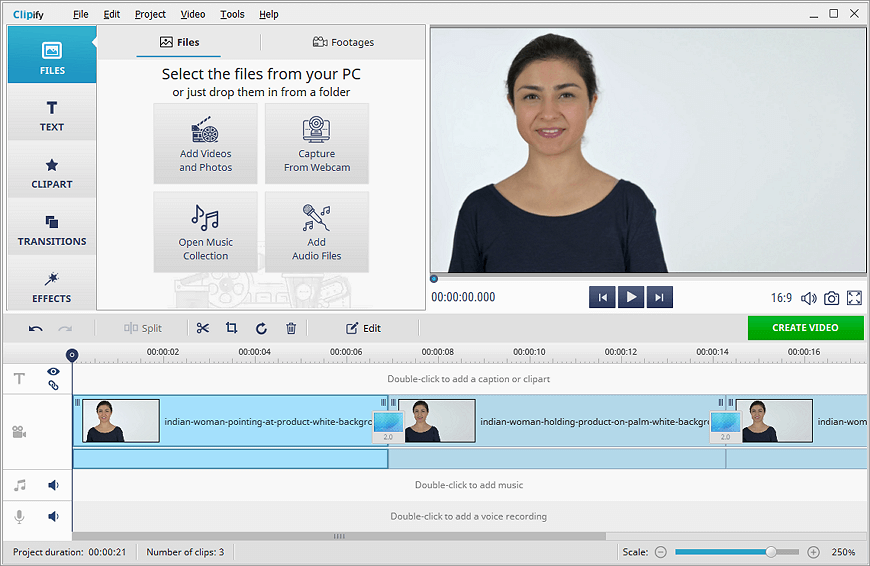
Step 1. Add Your Videos to the Project
The first thing you need to do is to add a video or multiple video clips you want to edit to the timeline. Clipify allows you to improve your video quality and edit it the way you like. You can apply the auto enhancement to your project or color correct it using the Curves. When you are done with alterations, proceed to the next step.

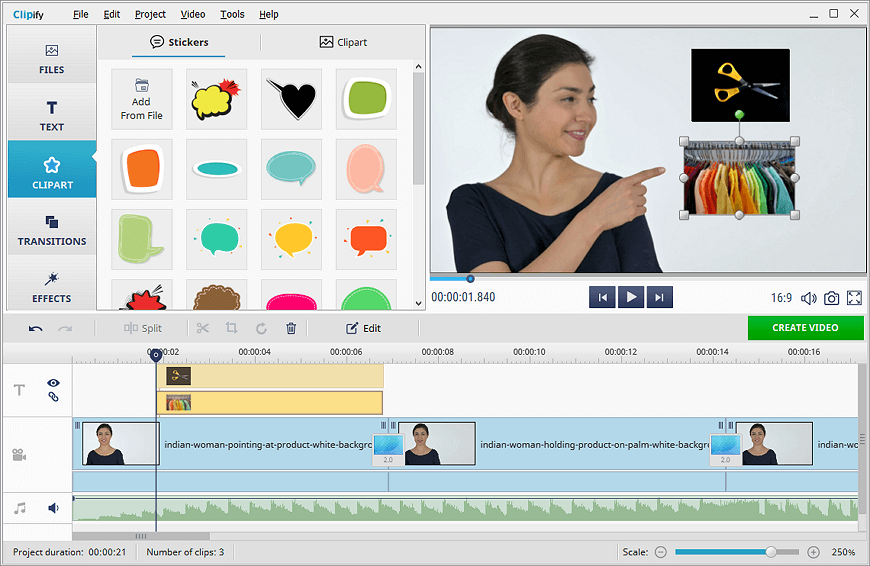
Step 2. Add an Image Over Your Video
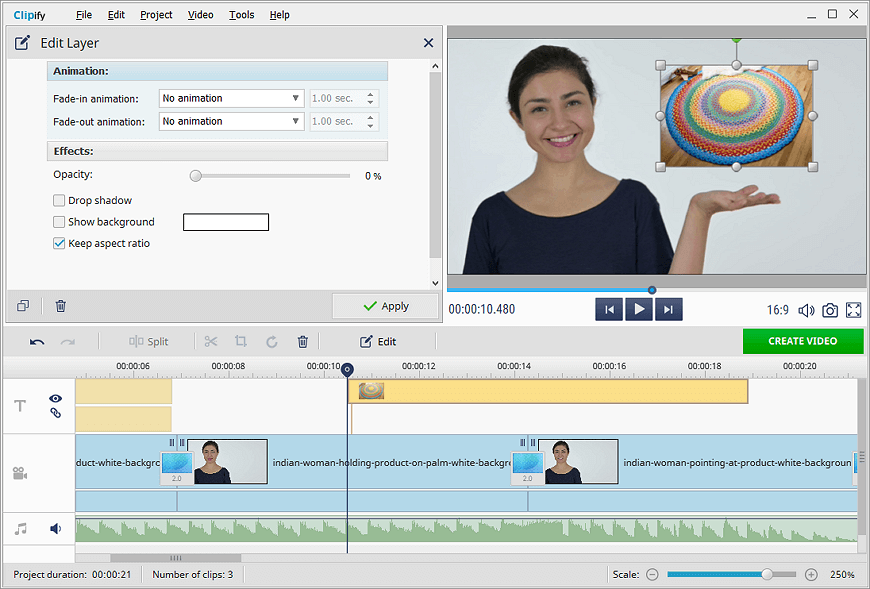
To overlay an image on a video, you need to access the Clipart tab. It will show a whole menu with different pictures. Pick one from Clipify or click on “Add From File” to select your own. Once you pick the image, drag it to the timeline. Now, place the picture where you want it to be shown. Modify the picture’s size, opacity, or shadow by double-clicking it.

Step 3. Save Your Improved Video
To be able to show the video you’ve just edited, click on the green “Create Video” button. Pick the file format you want the video to be in. There are plenty of formats to choose from, it depends on the platform you want to share your video on. An AVI video is suitable for PC, while HD looks good on big screens. You can also find an option for mobile phones, YouTube, Facebook, and Vimeo.

As you can see, Clipify is an easy tool for video editing. You can not only overlay graphics on a video, but use a whole set of useful tools. Everything is possible with Clipify: adding effects, music, and texts, performing video color correction, or even changing the background of a green screen clip. There are also instruments that help to remove black borders from a video, stabilize shaky footage, and make your video slower. It takes only a few minutes and allows you to produce a high-quality video.
 Clip
Clip