How to Censor a Video to Protect Privacy and Conceal Sensitive Data
Filmed a video at a public place and accidentally captured other people? Need to censor YouTube videos so your content is not blocked as harmful or dangerous? Want to blur a baby’s face or your car’s license plate? You can do it in a jiffy using a video censoring tool!
Read on to discover common censorship effects and a step-by-step guide for applying them with an intuitive video editor for PC. As a bonus, we’ll show you a few mobile and web-based alternatives, give essential tips, and answer frequently asked questions on censoring. Sounds like the guide you need? Then let’s jump right in!
4 Common Types of Censor Effects
There is a wide range of effects suitable for censoring videos. Let's take a look at 4 commonly used types of censoring and see which one works better for you:
- Blurring videos
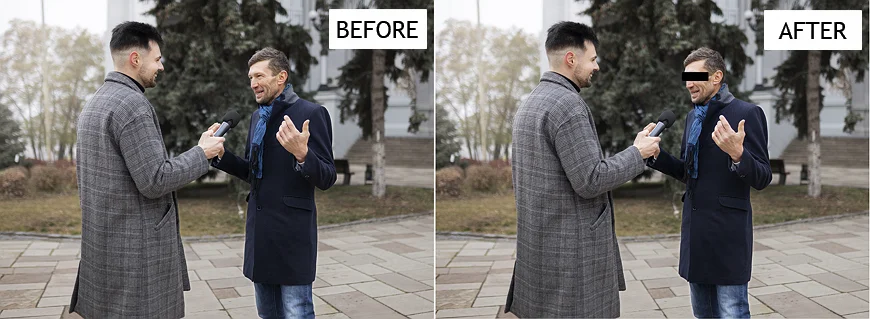
You might need to blur parts of a video if there are people in it. To protect their privacy, you should anonymize faces, and blurring is the most suitable effect for it. In addition, this style is a good choice for obscuring explicit and potentially sensitive scenes in your video content. - Pixelation effect
Pixelate videos if you need to conceal private, offensive, or distracting details while providing viewers with the context. - Black or color censor block
To obscure faces and hide license plates, you can add a censor block of a desired color. This censor effect also helps you comply with broadcasting standards and hide logos so you don’t breach a contract in a sponsored video. - Censor screen
A censor screen is often used for a humorous effect as a transition between clips. The same way, you can include it to censor parts of your video. In addition, there are different types of censor screens, so you can use the one that works better for your project. For instance, you may add a no signal picture or other TV glitch effects.
Censor a Video on PC: 4 Easy Steps
Want to have a wide choice of censoring styles and an intuitive toolkit at your disposal? Then you should try Clipify, an automatic video editor for Windows. It lets you censor your footage by blurring it, applying the pixelate effect, and adding censor bars. By the way, you can choose the shape of the censored area. There are also 500+ stickers and cliparts in Clipify that let you hide parts of the footage. Would you like to give it a go? Then follow the instructions below:
Step 1. Install Clipify on Your PC
Use the button below to download the installation file. Launch it and follow the setup instructions. Once you’re done, start the video editing software.
 For Windows 11, 10, 8, 7
Step 2. Censor Your Footage
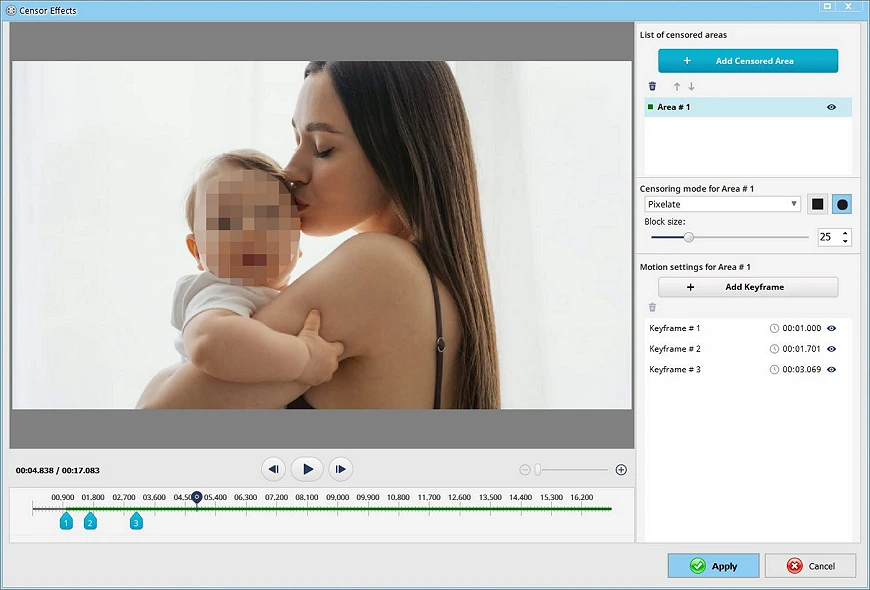
Click on the eye button called Censor Sensitive Areas to open the video censor tool. Hit Add Censored Area and move the selection. Drag the handles to resize the censored area. In the dropdown menu, choose from Pixelate, Blur, and Solid Color.
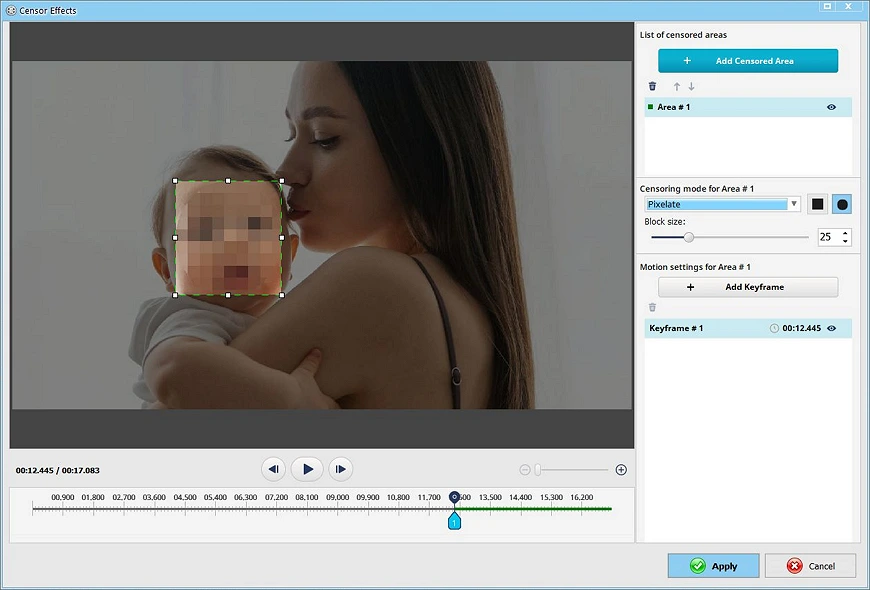
Step 3. Track the Motion
If there’s a moving object in the footage, you need to add keyframes to track the motion. To do so, click the corresponding button in the right-hand panel. Then change the position and size of the selection on the preview window. Play your clip to see the changes and hit Apply.
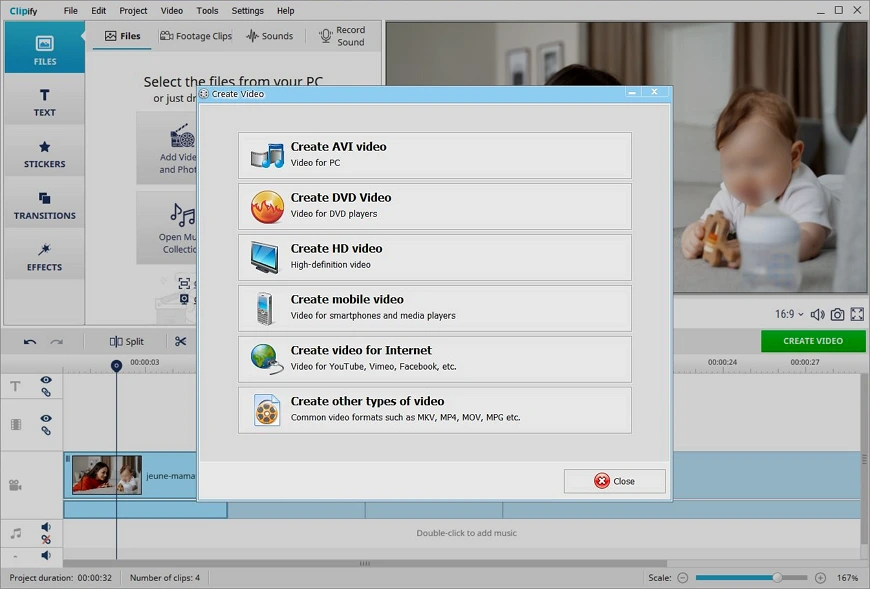
Step 4. Save the Censored Videos
To export the edited footage, hit Create Video and pick the file format you like. You can make a video to share it instantly on social media. There are also options for mobile devices, popular formats like MP4 and AVI, and so on.
After you censor your footage, play around with other tools in Clipify to get the most out of your videos! It lets you easily remove sound from video, record audio, and add sound effects. There’s also a huge collection of 300+ music tracks, 300+ effects, and 50+ customizable text styles. Plus, you can instantly change and blur video background, correct colors with RGB curves, adjust the speed, make Picture-in-Picture videos, and so much more!
