How to Record GoToMeeting Sessions: Easy Guide
The industry of online communication software is big, and GoToMeeting is among its leaders. It is an all-encompassing solution, trusted by millions around the globe. However, as effective as GoToMeeting calls can be, important stuff still can be lost. But how do you preserve the lectures, team meet-ups, and brainstorming sessions in their entirety? The answer is “just record it”.
So, how to record GoToMeeting sessions, then? Whether you are an organizer or an attendee, there are nuances that you have to keep in mind for a successful capture. And we will cover what you need to know for recording a GoToMeeting call on both sides.
Let’s get down to business and see how to use simple GoToMeeting video recording tools for PC, Mac, and mobile devices.
How to Record GoToMeeting as an Organizer
In case you are an organizer or a co-organizer of a call, the first thing you can opt for is recording a GoToMeeting session with a built-in feature. However, to access the integrated recorder, there is a set of conditions you have to meet:
- Organizer or co-organizer status
- Pro or Plus tier subscription
- Cloud recording activated by admin
Now, once you tick these boxes, how can you record a GoToMeeting? Just do as follows:
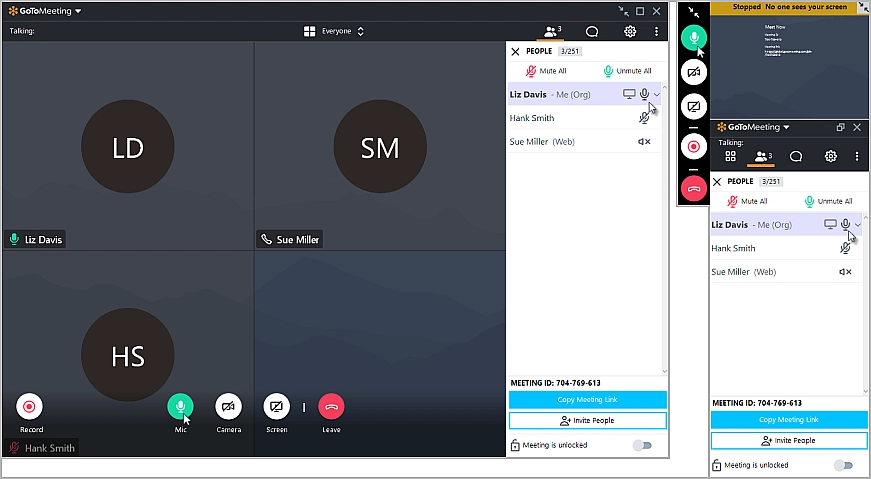
- Start or join a meeting. Also ensure you are sharing the screen, in case you want to capture your on-screen activity.
- Click the record button. The REC icon will begin to glow, and the attendees will get a recording notification.
- Once the call is over, you'll be redirected to the website where you can access the recording.
That’s it! For more information, you may visit the official support page. There you will find lots of useful information, video guides, and further reading.
How to Record GoToMeeting as an Attendee
Sadly, in case you are just an attendee of a GoToMeeting webinar, a built-in capture feature is not an option for you. But there are other solutions you can try. You can even record GoToMeeting as an attendee without permission (but it’s wise to ask for it regardless). Let’s take a look at 3 apps that can help you with recording, one for each major platform – PC, Mac, and mobile.
Record GoToMeeting Webinar on PC with Clipify
If you are a Windows user, then try Clipify – an automatic video editor for Windows 10, 11, and older. Among other things, it can capture everything you need – screen, camera, and microphone. As a video editor, Clipify is very accessible yet has lots of advanced features, from Chroma Key to Picture-and-Picture editing. You can also add and animate titles, captions, and various visual aids to make the video more informative. It is great for recording a call and editing it right away. Here’s how to record a GoToMeeting session on Windows with Clipify:
- Install and launch Clipify. Download the installation file. Then run this file and follow the wizard prompts. Once all is set, launch the program.
- Prepare for recording. On the startup screen, create a new project. Then, in the Files tab (it will open by default), select Capture screen video.
- Begin capturing. In the new window, pick the recording type (Full Screen, Window, or Custom Area), check the corresponding boxes if you want to capture your microphone and webcam, and click Start Recording.
- Finish the recording. Use the Pause button to put the recording on hold, and the Stop button to conclude it. Then you can edit your footage if you want. Once you are done, click the Create Video button to export your video.
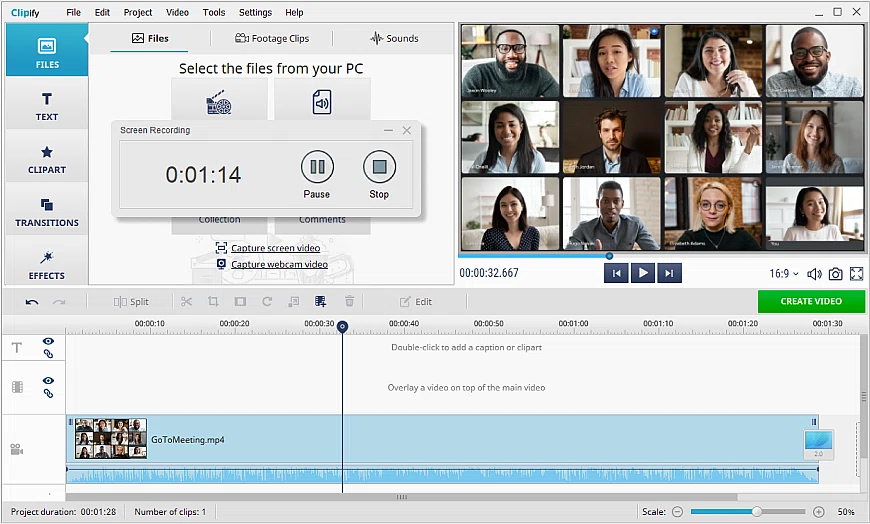
With Clipify you can turn your webinar footage into an engaging video right away! To make it all more clear, add text to the videos. In case things get hectic, change the speed of a video and take your time. To include everything you need, easily overlay videos. And that’s but a fraction of what you can do with Clipify!
Record GoToMeeting Session on a Smartphone with Record it!
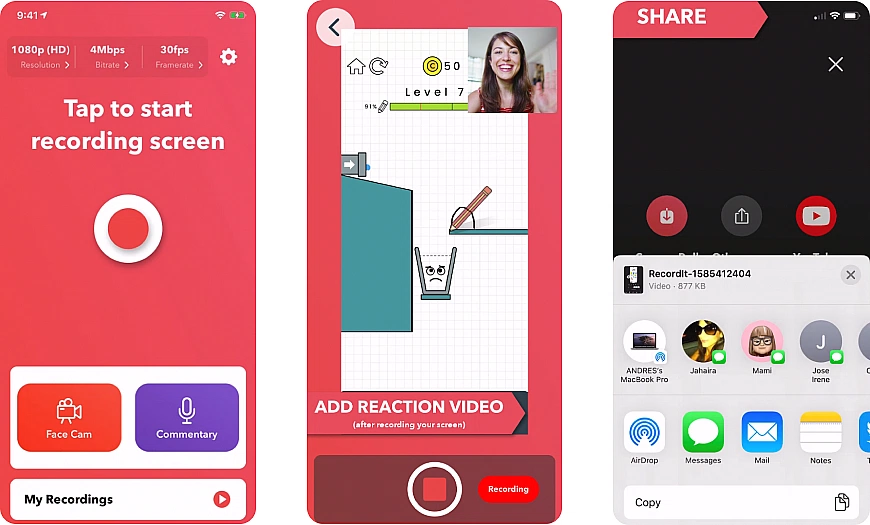
Record it! allows you to record the screen of your mobile gadget, be it an iPhone or an Android device. With it, you can record a GoToMeeting as not organizer, capture gameplay, and whatnot. There are also tools for enhancing your footage – crop and rotate, adjust speed, add reactions, record audio commentary, and more. Here’s how it works:
- Start the recorder. Begin your video call, then run Record it! and tap the red button to begin capture. Hit Stop Broadcast once the call is over.
- Edit your footage. If you want, use the features of the app to cut out unwanted parts, add commentary, apply visual effects, and use other editing features.
- Save the video. You can store the footage on your device or share it on YouTube right away.
 Clip
Clip