How to Add a Logo to a Video in a Few Clicks
Need to put your logotype on your footage, but don’t know where to start? It’s a common problem among bloggers, business owners and anyone trying to make their video personal. A logo is not just a beautiful image - it identifies your brand and its values. Therefore, it is important to do it right. And we’re here to help you!
In this article, we’re going to show you how to put a logo on a video step by step. We’ll guide you through the whole process in video editing software named Clipify. It is a free video editor for both professional and non-professional users. The software has a variety of tools ranging from basic to advanced. Additionally, we’ll talk about alternative ways to quickly apply a signature to a video.

Afraid to waste an awful lot of time trying to learn how to add a logo to a video in a video editor? No worries! Clipify is super simple and user-friendly. That’s why we suggest trying it first. Remember, the best way to learn is doing it yourself. Just follow these steps to finally put your first logo design on a video.
Step 1. Install Clipify on Your Computer
Click the button below to download and install Clipify. Then start the program and choose a Blank Project.
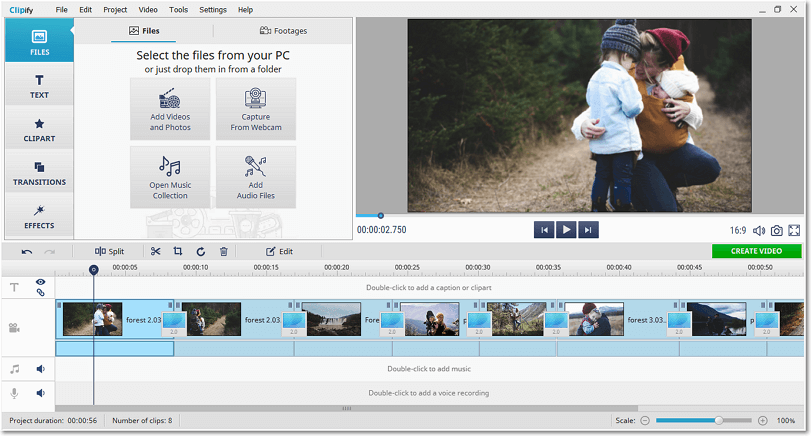
Step 2. Import Your Videos and Photos
There are two ways to add videos and pictures to the timeline. You can either drop the files in from the folder or click Add Video and Photos. If you’re not happy with their quality, don’t give up! Auto enhancement will significantly increase it in just one moment. All you have to do is click Edit, open the Enhancement tab and tick Auto Enhancement. Before you move on to the next step, make sure to rearrange your clips the way you want.

Step 3. Add Your Logo to Your Video
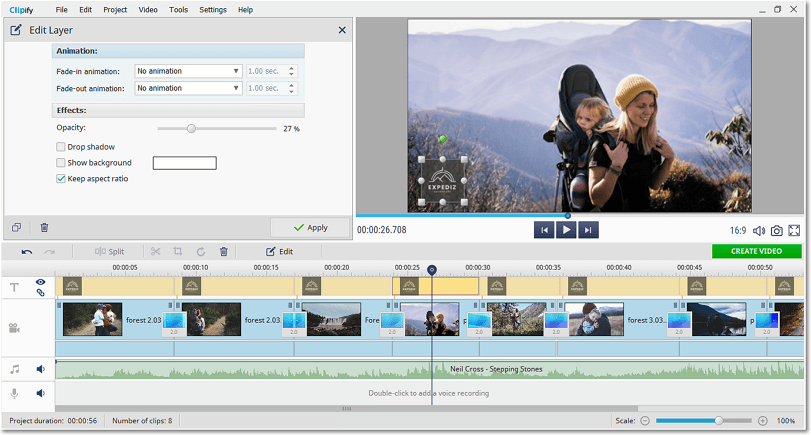
Switch to the Stickers tab and click Add from File to select a pre-designed logo. You can place the symbol wherever you like and change its size. Make sure to adjust such settings as background color and opacity by hitting Edit. Click Apply to put the logo on the footage.

Step 4. Save Your Video
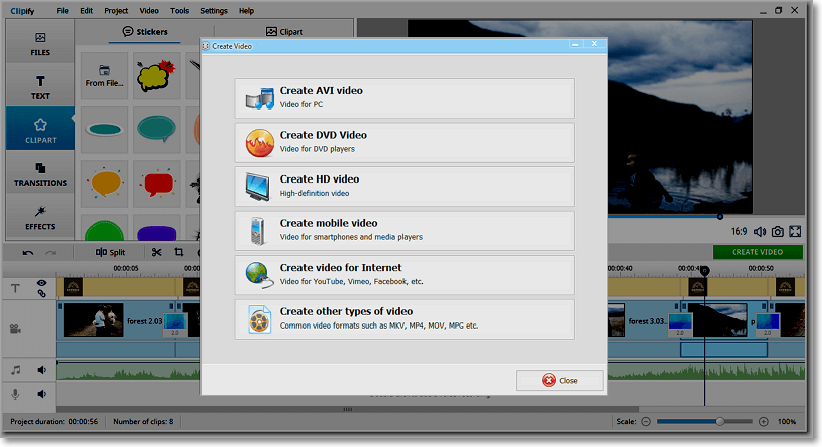
To save your branded video, you need to click Create Video and select the type of video you need, e.g. mobile video, HD video, DVD video as well as videos for such websites as YouTube, Vimeo, Facebook, and so on. Finally, change the final settings - quality, frame size and file size, then save the file.

Now you know for sure that putting a logo is a piece of cake. As you can see, Clipify has got a lot of tools to take your video to a pro level. For example, you can easily clear up unwanted camera shakes and make the quality better in order to stabilize a shaky video. The program lets you instantly add a voice over to a video, which is a key feature for creating social media videos and advertisements. Another timeless trick to give a video a professional and cinematic look is to zoom in a video, which can be done effortlessly in Clipify. Add music, write your text, try various effects - you can easily stay creative with this video editor.
Still, many of us would rather see something than read about it. So check out the video tutorial and find out more about the features Clipify can offer you.
Clipify is remarkably easy to use. If you download the program and follow the instructions, you will see yourself how simple it is to turn your ideas into reality.
 Clip
Clip
